
Copyright 2011. figNoggle Designs.
7x10, 7x12, 7x14 Mini-Lathe Information
Website Links
Post a link to your website or view other hobby and machine and metalworking websites for free.
|
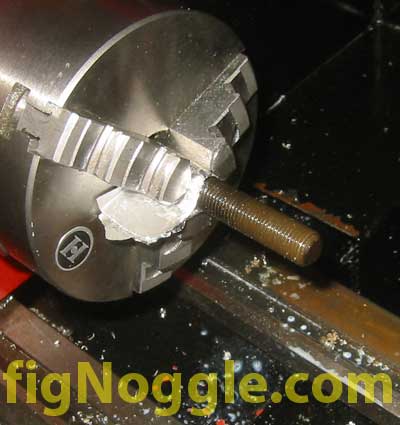
Rent Mill & Lathe DVDs at Smartflix | Great aluminum & steel prices at OnlineMetals Enco 20" 1PH Square Column Geared Head Mill Drill (aka Rong-Fu 45 Mill Clone) - R8 Collet Fitment Issue Solved! In our previous installment, we thought that the fitment issue was with the depth of the locating pin. Turns out that it was not the case at all. Here's why: It seemed strange to us that with the collet slipped in halfway up the spindle, there was significant play between the locating pin and the collet slot. Although we previously measured the diameter of the threaded end of the collet between the three different models with identical diameters (with a 0.0005" variance), it seemed impossible that this would have caused the fitment problem. Even when faced with the Dykem layout dye experiment (towards the bottom of the previous installment's page), it still seemed unlikely. So, to humor ourselves, we decided to sand down the diameter by less than a thou. We couldn't just chuck the collet into a lathe since we wanted to sand the part that would normally be chucked. Instead, we first chucked the drawbar into the lathe:
Next up, take the collet and thread it on. Notice that the thread sits at the front of the jaw chucks. This lets us thread the collet and hand tighten it just right.
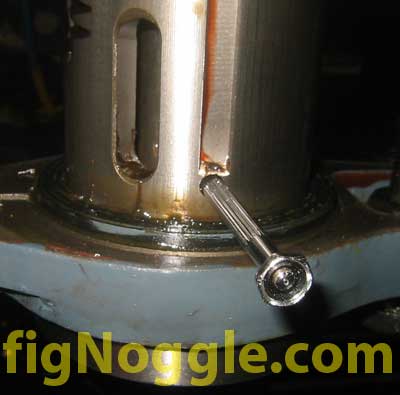
Using some 1" wide sandpaper on the roll with grits 60, 180, 120, and 220, it only takes a few minutes to sand down that less than 0.001" amount. Repeat as necessary for all the collets you own that don't quite fit. That worked for us and should also work for you if that's the problem you're having. Now that that mystery is solved, we'd like to point your attention to something else. Again, in the previous installment, we showed a picture with what looked like two locating pins. Turn out one of them can be accessed from the outside of the quill. You'll need to feed your quill a few inches to see the hole on the left side of the quill:
Caution! There's a slotted set screw in the spindle. With collets removed, turn clockwise until the set screw falls through the inside of the spindle. We accidently unscrewed it all the way out. When this happens, the set screw ends up in the space inbetween the outside of the spindle and inside of the quill - no man's land. We had to sacrifice a cheap Enco scribe that had a little magnet on the end to pick up the set screw. The little "tool" we made was a bent #6-32 machine screw of some length that was threaded into the nub of the cut scribe that contained the magnet.
That little mistake took quite a while to resolve. Don't let it happen to you! This made us wonder.. What exactly is that little set screw for? There's already a locating pin inside the spindle. Perhaps it's a spindle lock? After all, there's no spindle lock for this mill. You could do something like this:
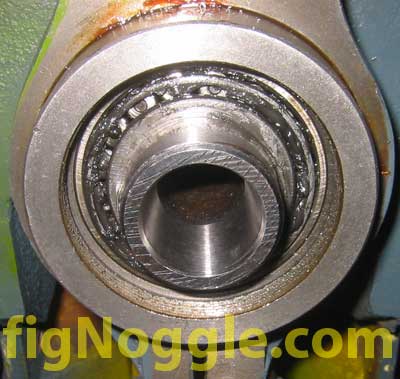
This would let you torque down your tooling better than by using just your hands. Since we're here, we also wanted to show you the bearing "seal" for the lower taper bearing on the spindle. You unscrew the metal cap (the one with the three indentations):
Then you get to take a look at the taper bearing:
There's nothing to do here. Just thought you'd be interested in taking close-up looks at the "guts" of the machine. We hope this helps! |


Looking for mini-mill help and how-tos? How about lathe help and how-tos?
We're prototyping a benchtop CNC vertical mill using the DigiSpeed-XL interface card for Mach, Dart Controls and KB Electronics KBIC/KBMM 90VDC motor controllers, 1.5HP treadmill motor from Surplus Center and a R8-spindle head from the X2 mini-mill - not to mention Gecko servo drives and an entirely closed-loop system. Come take a look!CNC 8x12 Lathe
Check out our newest developments like the CNC/DRO 8x12/8x14 lathe using Gecko drives, break-out board, NEMA 34 step motors, DRO and more!
SUPERX3.COM
Sieg X3 and Super X3 Grizzly G0463 Info
MDAHacks.com
T-Mobile MDA / Cingular 8125 / HTC Wizard Hacks, Tweaks, Tips, Tricks and More!
Metal Working FAQ.NET
Your source for metalworking and machining, tips, tricks, and more. Over 50 content wiki sites!