
Copyright 2011. figNoggle Designs.
7x10, 7x12, 7x14 Mini-Lathe Information
Website Links
Post a link to your website or view other hobby and machine and metalworking websites for free.
|
Rent Mill & Lathe DVDs at Smartflix | Great aluminum & steel prices at OnlineMetals Round Column Mill Drill Vibration Fixes?
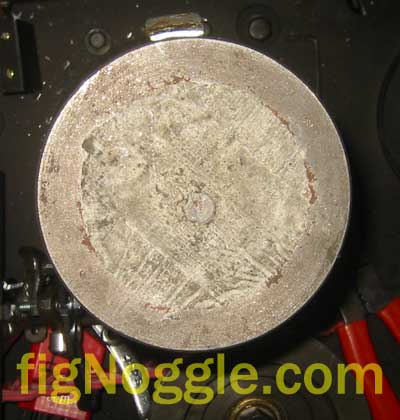
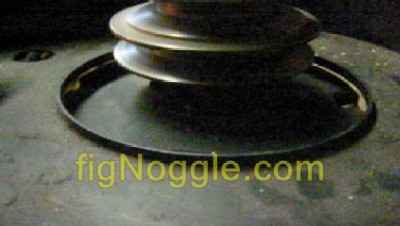
We've tried two more things at an attempt to reduce vibration and improve surface finishes. Actually there's a third and we'll get to that later. The first thing people here of (kind of like an old wive's tale) is to fill the column with concrete, cement, or some synthetic material that will somehow dampen or eliminate vibration. We don't know exactly the vibration of which people speak, but in our case, it appears that the motor has the low frequency vibration that ends up being transmitted to the table thereby making the surface worse than our little mini-mill. Imagine that! Since our mill drill already had the column filled with some sort of cement/concrete material (we really don't know what's in it other than that it's hard like the sidewalk but with more density..). Here's a shot of what it looks like.
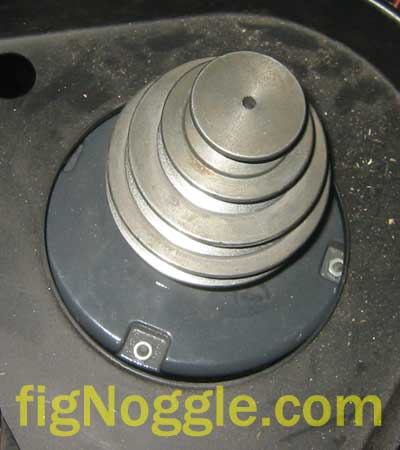
Since we don't have an originating data point, if an unfilled column yielded rougher surface finishes, this mill would be a true disappointment. Since there are many users out there, we're guessing that this filler makes little difference. And maybe we're expecting too much from this mill drill to begin with. After changing the stock belts for Fenner brand Power-Twist belts that claim to reduce vibration, their claim was somewhat true. But, we wondered what originated the vibration to begin with. So, starting with the motor, we disconnected the belt and turned it on. It was the source of the vibration - a low frequency vibration. Perhaps it was the pulley that was off-balance? Here's how we removed the motor pulley. Since we had the adjust-a-lnk belts, we wanted to flip the motor pulley upside-down and then connect it directly to the spindle pulley. If you're paying attention, you'll know that that's not possible since the motor pulley is only turned such that the its orientation is fixed.
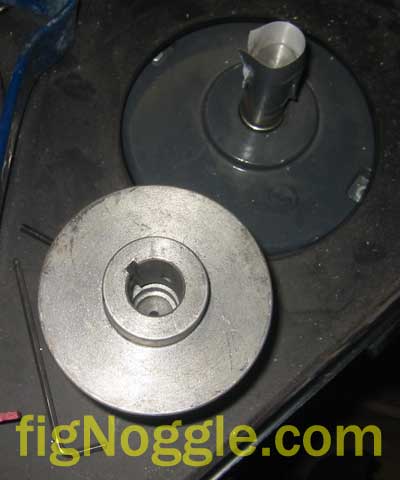
There are two set screws that we need to loosen first before we use the gear-puller to remove the pulley.
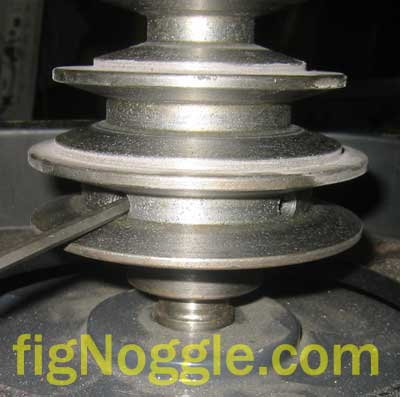
You could potentially just pry the pulley off at this point, but erring on the side of caution, we used a gear puller (same 4" to remove the spindle puley) but first had to stick a length of threaded rod that would fit inside the motor pulley to offset the motor shaft end. After using the gear puller a certain amount, we were than able to apply (safely) a pry bar to continue removing the pulley from the motor shaft:
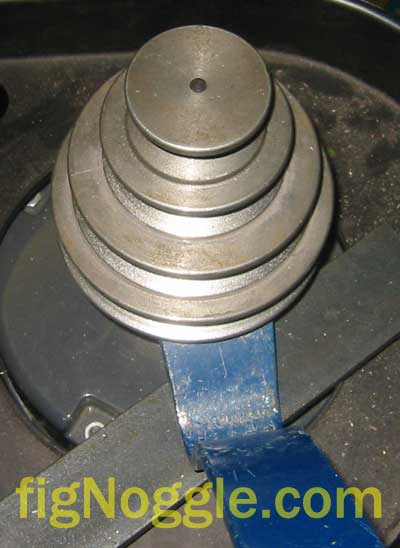
After all that work, we take a look inside the pulley. It has a keyway (the motor uses a key to positively transmit force):
Now the real test. What's the difference between the motor turning and the motor tuning with the motor pulley installed? Click on the image below to find out:
Sounds about the same? We think so too. So, what's next? Another motor. That appears to be the problem. Stay tuned...
|
Looking for mini-mill help and how-tos? How about lathe help and how-tos?
We're prototyping a benchtop CNC vertical mill using the DigiSpeed-XL interface card for Mach, Dart Controls and KB Electronics KBIC/KBMM 90VDC motor controllers, 1.5HP treadmill motor from Surplus Center and a R8-spindle head from the X2 mini-mill - not to mention Gecko servo drives and an entirely closed-loop system. Come take a look!CNC 8x12 Lathe
Check out our newest developments like the CNC/DRO 8x12/8x14 lathe using Gecko drives, break-out board, NEMA 34 step motors, DRO and more!
SUPERX3.COM
Sieg X3 and Super X3 Grizzly G0463 Info
MDAHacks.com
T-Mobile MDA / Cingular 8125 / HTC Wizard Hacks, Tweaks, Tips, Tricks and More!
Metal Working FAQ.NET
Your source for metalworking and machining, tips, tricks, and more. Over 50 content wiki sites!