
Copyright 2011. figNoggle Designs.
7x10, 7x12, 7x14 Mini-Lathe Information
Website Links
Post a link to your website or view other hobby and machine and metalworking websites for free.
|
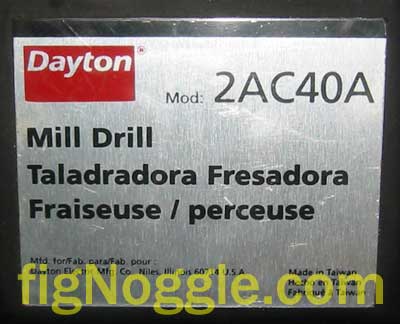
Rent Mill & Lathe DVDs at Smartflix | Great aluminum & steel prices at OnlineMetals Grainger Dayton 2AC40A Round Column Mill Drill (AKA Rong-Fu 31 w/Large Table - 9.5"x32")
We lucked out on this one. While we've experienced the drawbacks of the simple round column drill press with its ability to lose the X/Y positioning as the head (Z-axis) is moved, we were a bit cautious to make such a purchase.
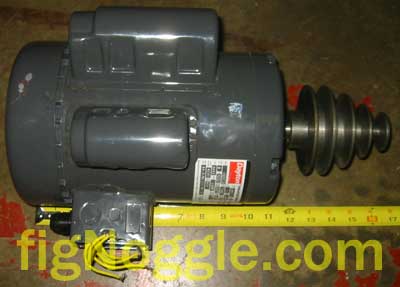
However, we were made an offer we couldn't refuse. While scanning Craigslist one day, we found a Dayton Mill Drill 2AC40A. "What is this model?" we asked. We've heard of just about every version of the Rong-Fu round column mill-drills ranging from the RF-25 to the RF-40 (the RF-45 is the start of the square column / dovetail column mills and is much preferred over the round columns), but this one was new. The price was interesting enough to take a closer look. Unfortunately, there were only two references in the search engine. No manuals, pictures, or other forms of literature were found. So, we took a chance on this one. We were first surprised to find that this was a Taiwanese-made model. The quality of the table and even the base were much better than the "flash-laden" table or stamped sheet metal base of the cheaper, lower quality mainland Chinese-made knock-offs. Upon closer inspection of the motor revealed something else to our surprise - a US-made motor of much higher build quality than is usually found in the Harbor Freight line of machinery (you know, the black-painted tin can motors):
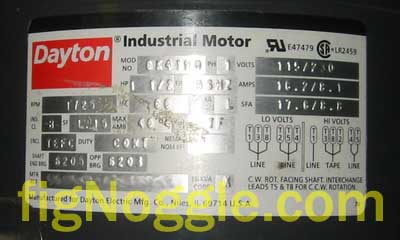
We haven't researched the motor yet, but here's the label in close-up:
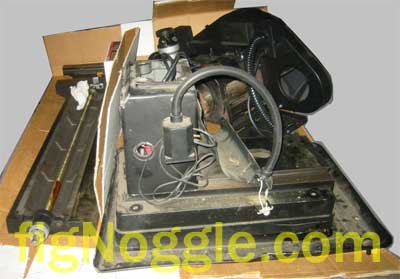
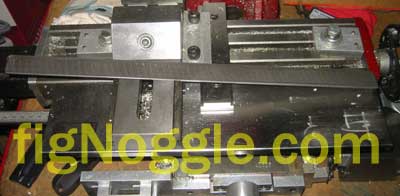
To even bring the mill-drill back from the seller, we had to disassemble it in its entirety in order to move it:
In the above picture you can see the table, carriage, base and head/column. We didn't remove the column from the head assembly. This would have saved us from carrying an additional 30+ lbs. With a 4.5" diameter steel column that was already pre-filled with some form of filler material like concrete/cement, it made for a heavy addition. Once removed, the head was much easier to maneuver. We were also lucky in that the table was a 9.5" D x 32.5" W table in excellent condition. There was minimal wear. In fact, the entire mill was barely used and hadn't been lubed in a long time. The grease had caked and "stuck".
The next day, two people (yes, two) moved the pieces you see above (plus base/chip pan and stand) down two flights of stairs into the workshop. The most challenging part of the move was the spindle/head. Even with the column removed, we thought is best to strap it to a upright dolly and wheel it down the flight of stairs one stair at a time. That was the easy part as you'll read later.. First let's take a look at the Taiwanese-made Rong-Fu clone. Here's a shot of the cast flashing in the base. We didn't expect the machine to be polished so we expected this:
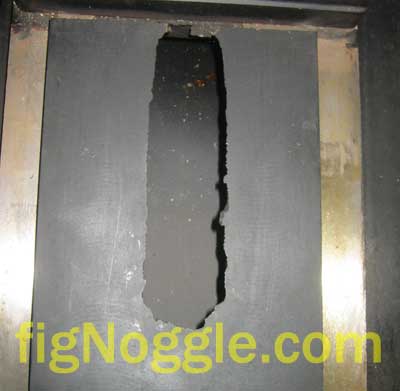
In fact we could increase Y-axis travel by grinding down the front part of the base. With a 6"+ travel, it should be good for now. Here's an interesting picture. The table itself is somehow mis-cast. There's a chunk missing underneath the front-side:
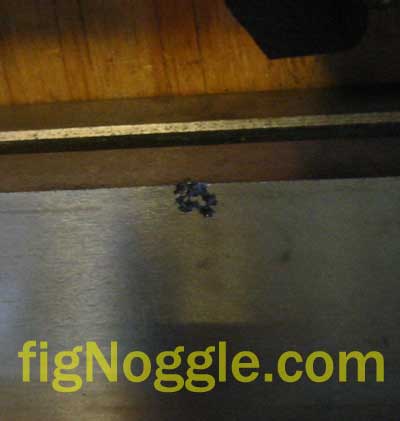
This isn't terribly worrisome. The saddle has grooves in it to retain lubrication. This is a nice touch for this type of machine. It would be a good idea to rig up some sort of one-shot lub system since there's plenty of space to work with:
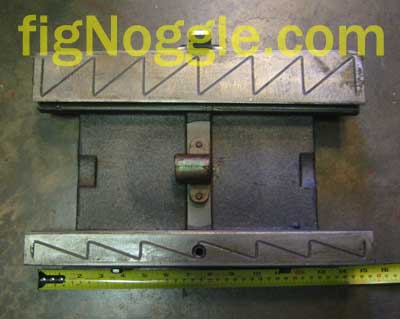
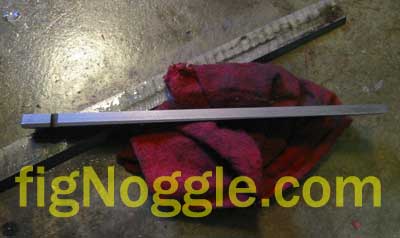
It's a just around 15 1/2" inches wide. The bronze cast nut for the X-axis is held in place from under the saddle using two socket head cap screws (allen). The hole you see at the bottom of the saddle is for the Y-axis leadnut. And here it is:
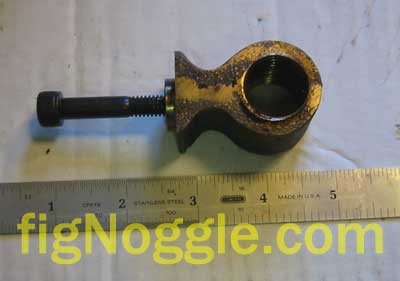
As you can see, there is nothing special about these nuts. Important to note is that these nuts are not of the split-nut design, so backlash is a huge problem as we'll get into a little later.. Guess what the first project is going to be when this mill's powered up?\ For us mini-mill owners, we can easily fabricate a replacement gib out of brass, acetal/delrin, steel, etc.. since the shape is a parallelogram in profile that's of a certain lengthe. WIth the mill/drill, they use a tapered gib that has an adjustment screw which inserts/extracts the gib with the turn of the screw (as you can see from the notch in the gib):
Since we mentioned mini-mills, here's a picture of the X-axis gib strip on the Sieg X2 mini-mill table:
It's actually wider than the table! This gives you an idea of how large the 9.5"x32" table really is! Back to the backlash situation on this mill. It's bad. Our rough calculations show that it's between .025" and .035" in the Y-axis. That's bad enough. Let's just assume the X-axis is on par with this terrible number. One of the reasons for this is due to how the leadscrew is "secured" into the bearing block and bearings. The mini-mill and variants we've seen has a threaded end which, when turned, can set the preload of the bearings and eliminate axial play. With this mill (remember that this is used and this could have been performed by the previous owner and not done at the factory - if it was done at the factory, it's a poor design!), the X and Y axes have a castle-nut type spacer between the bearing block and handle. The handle is mounted using a set screw to hold it in place (no flat spot on the shaft). The castle-nut spacer is secured using a roll-pin inserted through it and the leadscrew shaft! How can axial adjustments be made to rule out play? It can't. Horrible design!
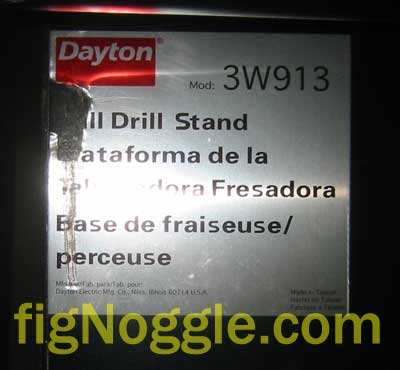
We're going to have to fix this one ASAP if any CNC conversion is to be made.. Note the oil-port on the block. That's a nice touch. And finally, the mill came with a stand that was made from heavy guage sheet metal, welded, then powder coated. Very nice stand indeed. Here's the label:
It's a Dayton model 3W913. Try to find a reference of that one. Hey wait, we found the Grainger SKU 2AC40 and everything! It's a current model selling for $1640 not to mention the base with a sticker of $348.50 which makes this total package $1988.50. This really was an offer we couldn't refuse :) (And with tax and shipping....) Here are the specs from their website:
Milling and Drilling Machine Precision, fine-feed spindle with 0.001" graduations.
And a much better picture than one we can provide:
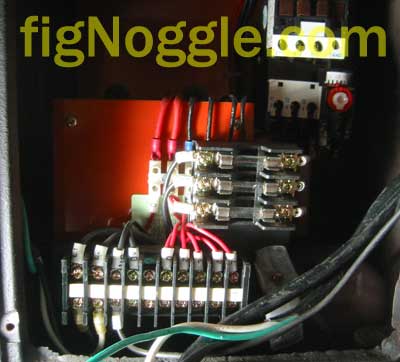
So now we know what mill-drill this is. We were going to ask how to perform wiring for 110V service since we thought this was one of those 110/220V models (we know the motor is) and had subsequently tried to wire it up as such. Of course, it didn't work. In fact, when the plug itself was swapped we just heard a light buzzing sound like the cap start didn't have enough oomph to start the 110V-wired motor. Even the green light on the front switch panel didn't light up. This should have been enough of an indicator that things weren't going to work. We also tried pushing down in the contactor switch which did fire up the motor but also promptly blew a fuse on the 15A surge protector. So this means that we're going to need 220V service after all (or one very long extension cord from the oven :). All joking aside, this is very dangerous. Please consult an electrician, your manual, or other trustworthy source for electrical wiring. Here's what the inside of the base looks like with the transformer and wiring:
What you can't see are the two 110V convenience outlets on the cover which is where the flex-lamp plugs into. Here's the wiring schematic:
And the schematic (FX-380C) could also be a model number of the machine since we found a reference of this from a company called "PROMAC FX-380C PROMAC Bohr-Fräsmaschine 230V MK3, 2X 6-tourig" with their version:
Reassembly of this mill-drill was easy up until we had to lift mount the column/head back on the base. With only two people, no engine hoist, pulley, chain hoist or other method of employing mechanical advantage, we used the "step-by-step" method whicg goes as follows:
We highly recommend planning this one out properly before you break your back trying to do this. It would have been much easier if we had a chain hoist at least so that we could fashion some kind of double-up 2x4 gantry. Here are our first impressions of the mill in action. Stay tuned...
|


Looking for mini-mill help and how-tos? How about lathe help and how-tos?
We're prototyping a benchtop CNC vertical mill using the DigiSpeed-XL interface card for Mach, Dart Controls and KB Electronics KBIC/KBMM 90VDC motor controllers, 1.5HP treadmill motor from Surplus Center and a R8-spindle head from the X2 mini-mill - not to mention Gecko servo drives and an entirely closed-loop system. Come take a look!CNC 8x12 Lathe
Check out our newest developments like the CNC/DRO 8x12/8x14 lathe using Gecko drives, break-out board, NEMA 34 step motors, DRO and more!
SUPERX3.COM
Sieg X3 and Super X3 Grizzly G0463 Info
MDAHacks.com
T-Mobile MDA / Cingular 8125 / HTC Wizard Hacks, Tweaks, Tips, Tricks and More!
Metal Working FAQ.NET
Your source for metalworking and machining, tips, tricks, and more. Over 50 content wiki sites!