Copyright 2011. figNoggle Designs.
7x10, 7x12, 7x14 Mini-Lathe Information Website Links
Post a link to your website or view other hobby and machine and metalworking websites for free.
|
|
Rent Mill & Lathe DVDs at Smartflix | Great aluminum & steel prices at OnlineMetals
SIEG X2 MINI MILL
- MINI
MILL HOME
- DRO
- CNC V1 - CNC V2
- STUFFMADE - REDUX
- HOW-TOS
HOW-TO Smoothen XY Table Travel
After modifying the stock nuts on my
mill i improved the backlash some. now that months have gone by, things
began to get a little sticky at the ends of the X and Y travel. It just
required a little extra oomph to go the extremes.
So it was time to take things apart and see what's
what. Here's what i found.
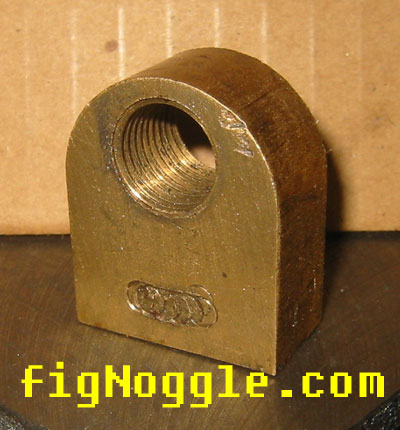
| check your parts |
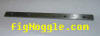
| stock nut. this was pre-modification as described in
the how-to.
notice the threads. |
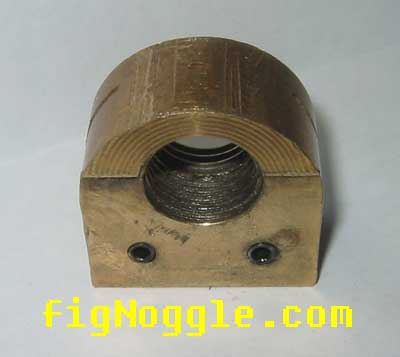
 |
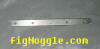
| notice the threads now. see how it's mangled? not
good it basically only has a few good threads. |
 |
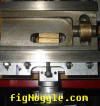
| but wait. here's how we got here.
you'll need to remove the table.
if you have the figNoggle Designs' CNC Conversion and our DRO installation, you'll need to
remove the X-axis motor plate from the end of the bed and the DRO scales.
loosen the gib set screws a little and begin to
crank the wheel until the bed is cranked out like you see. |
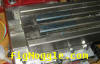 |
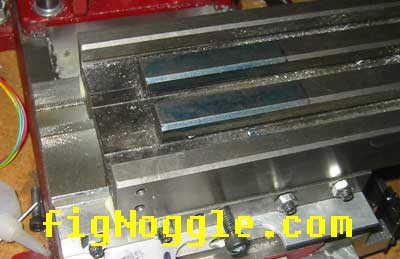
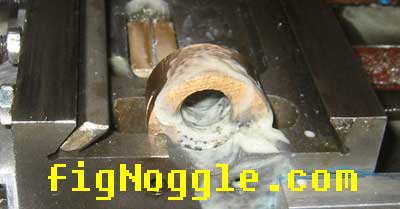
| here's the X-axis gib. notice how the pile up of
material around the indentations are rough? (maybe it's hard to see here) |
 |
| so, we take some 150+ wet/dry sandpaper and apply
some water to it. the paper's on a 1/2" thick metal plate.
start lapping a bit until the material build up goes
away. now it's better. smoother.
do the same with the Y-axis. |
 |
| be patient and do it right. you'll need grease for
this as well. |
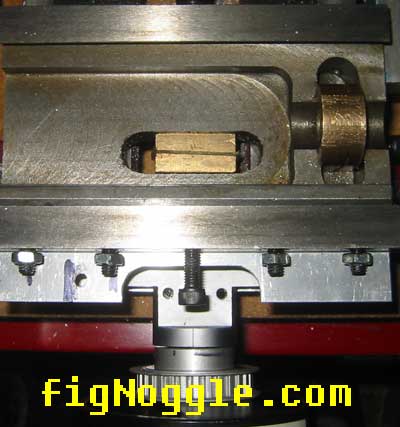
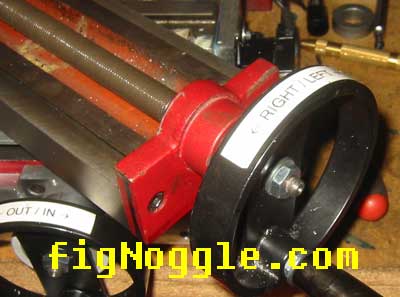
| now let's put things back together. we'll start with
the Y-axis.
start by loosening the two bolts
that hold onto the Y-axis leadscrew retaining block and the set screw for
the nut just a hair. also make sure the gib is not tightened down.
make sure you have the handle screwed on jut good
enough to have no play but be able to rotate freely.
if you had four hands you'd be able to dial things
in pretty quickly. since we're only human, we'll have to make finite
adjustments until it feels "right".
crank the wheel all the way towards you. start
tightening a bit on all screws. crank all the way to the other extreme. if
you start feeling a build-up of resistance, undo the gib and nut set screw
a bit.
go back and forth until it feels right. this takes
time. |
 |
| since we've modified the nut and cut away at some
material, we decided to shim the nut a bit. this is not necessary, but
this .001" thin shim lets us control the angles a bit. it helped.
ok, the Y-axis is dialed-in. |
 |
| put the nut in the cavity. grease it.
while eyeballing it, lift and center the nut. tighten
the two set screws just enough so that the screw doesn't fall back down.
the purpose of this is the help align the leadscrew. |
 |
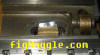
| make sure the leadscrew is fitted properly with the
handle in its place.
it should spin
freely (click for video) and not have any axial play. |
 |
| if the nut was centered well enough you should be
able to just slide the table into the dovetails (the gib was put back in
its place and the set screws loosened) this far before the threads should
be engaging. if you have problems lining up the leadscrew and bed
assembly, go back and adjust the nut. |
|
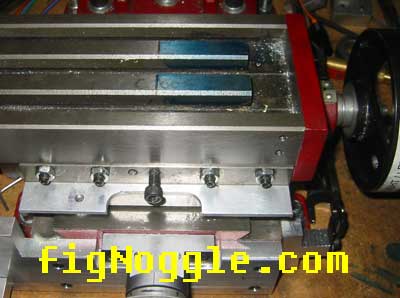
| start with one end of the table and work your way
back and forth until it feels right. there should be no play and/or
backlash.
you may have to adjust the gibs
and nut set screws many times during the extremes and middle of the table
travel to get it right.
this takes patience. |
 |
| To really make travel smoother, upgrade the stock
leadscrew and nuts with
doing so will not only reduce binding at the
extremes of table travel, the accuracy is more predictable (good for cnc),
and overall manual operation becomes "smoother". |
|
|
|

Looking for mini-mill help and how-tos? How about lathe help and how-tos? We're prototyping a benchtop CNC vertical mill using the DigiSpeed-XL interface card for Mach, Dart Controls and KB Electronics KBIC/KBMM 90VDC motor controllers, 1.5HP treadmill motor from Surplus Center and a R8-spindle head from the X2 mini-mill - not to mention Gecko servo drives and an entirely closed-loop system. Come take a look!CNC 8x12 Lathe
Check out our newest developments like the CNC/DRO 8x12/8x14 lathe using Gecko drives, break-out board, NEMA 34 step motors, DRO and more!
SUPERX3.COM
Sieg X3 and Super X3 Grizzly G0463 Info MDAHacks.com
T-Mobile MDA / Cingular 8125 / HTC Wizard Hacks, Tweaks, Tips, Tricks and More!
Metal Working FAQ.NET
Your source for metalworking and machining, tips, tricks, and more. Over 50 content wiki sites!
|